
Medium: Clay
Time: 5-7 weeks
Grade: 9-12 , Ceramics II
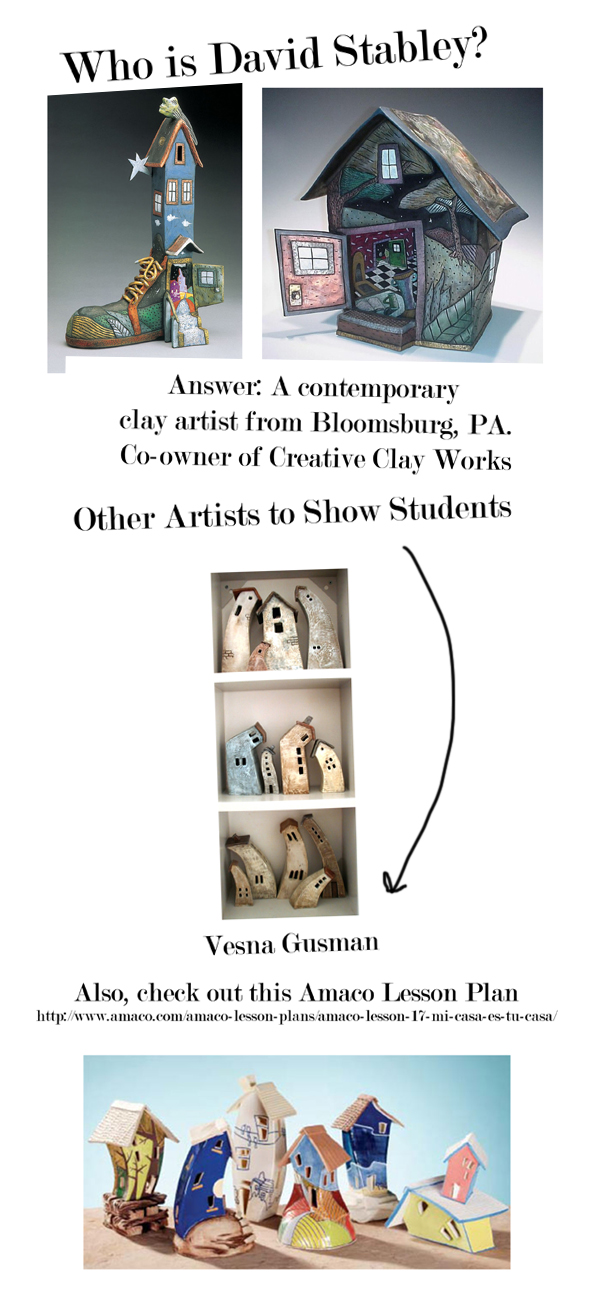
Objective: Explore the work of artist David Stabley & learn to make whimsical houses based on his technique.
Materials: Clay, roller, paint brush, vinegar, slip, paper towels, latex house paint, cotton swabs, Rub n Buff, rags, knife, fork, plastic bags.
[The Following Lesson is provided by ART EDUCATOR: Mrs. Jaime Cream, NJ]
The Instructional steps, Photographs and Student samples for this lesson are also located on her blog!
LINK TO: JAIME CREAMS Ceramics Site: CLICK HERE!
More about the Project: {Provided by Mrs. Jaime Cream!}
Project Objectives:
By the end of the unit, the students will be able to:
1. Students learn to make whimsical houses based on David Stabley’s technique.
2. Define relative vocab…
o Bisque — unglazed pottery after first firing
o Composition — the organization of a work of art
o Fire — a term used in ceramics; to heat the clay in a kiln at a very high temperature until it is dry and hard and becomes pottery.
o Incise — to engrave or carve a design into a surface
o Narrative — a narrated story
o Patina — corrosion (usually brown or green) that appears on copper or its alloys
o Score — to scratch or “rough up” surfaces of clay that are to be joined together.
o Scoring — a method of joining two parts of clay together that have dried to a leather hard stage by scratching the two surfaces and spreading slip between them as a “glue.”
o Slip — clay that has been watered down to a creamy consistency
o Template — a positive pattern
o Triptych — a work of art consisting of three hinged or folding panels
3. The lesson incorporates art history, aesthetics, and criticism with a hands on activity.
4. The lesson focuses on various ceramics techniques and important composition and design elements essential to creating a uniquely designed house from; fundamental technical skills for using specialty finishing products to create non-traditional surfaces; and self expression.
The students will…
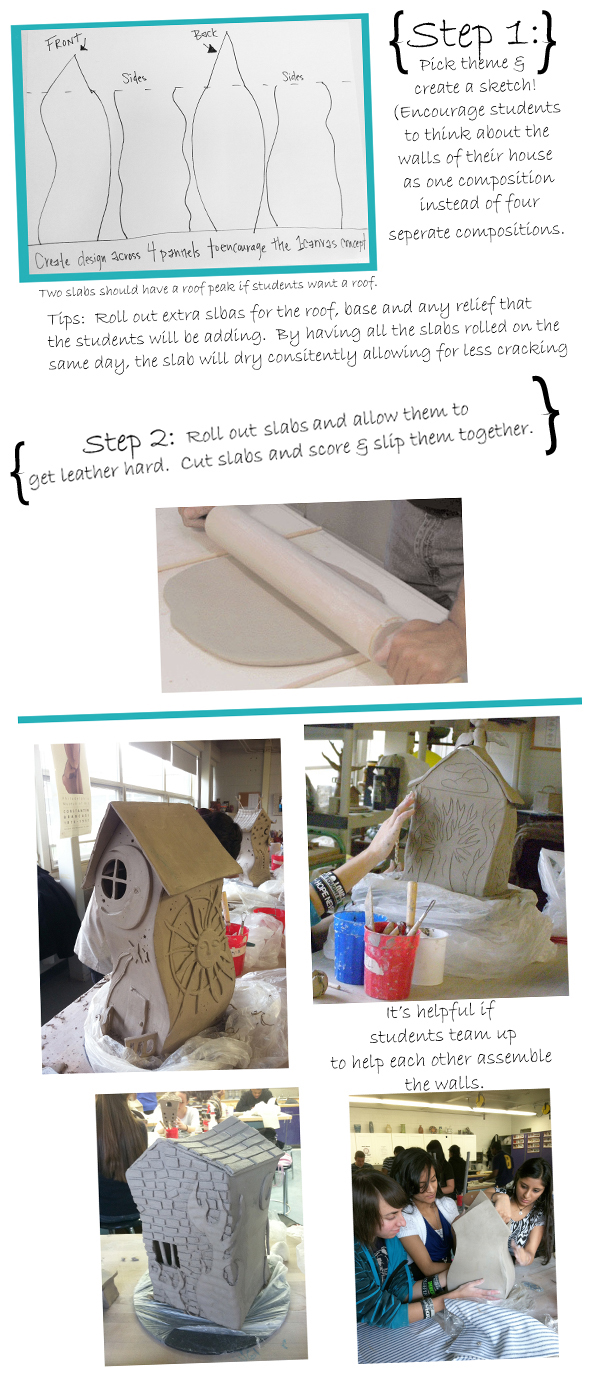
1. Use the slab technique to create a large house form. Even slabs, scoring & slip, leather hard consistency will be stressed.
4. The lesson focuses on various ceramics techniques and important composition and design elements essential to creating a uniquely designed house from; fundamental technical skills for using specialty finishing products to create non-traditional surfaces; and self expression.
The students will…
1. Use the slab technique to create a large house form. Even slabs, scoring & slip, leather hard consistency will be stressed.
2. Attach levels of clay and extrusions by scoring and using vinegar.
3. When the clay is leather hard, carve patterns, texture, and detail using a variety of ceramic carving tools. A dry paintbrush is used to brush away the clay residue that results from the carving.
4. Be sure that the clay does not become too hard throughout the carving process. Since it may take several class periods, students should wrap their pieces in damp paper towels and place them in plastic bags to prevent drying.
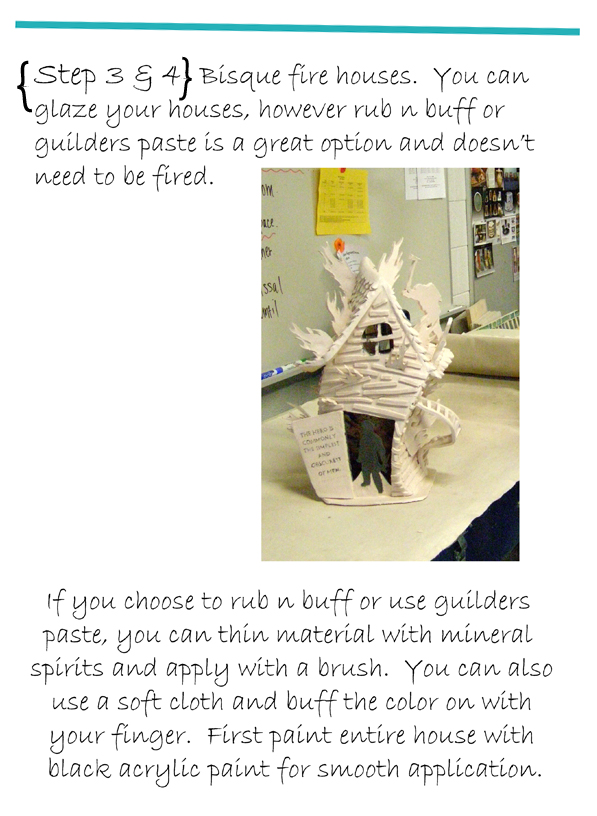
5. After drying and firing, the houses are painted with black (or any dark color like purple or navy blue) latex house paint.
6. Using clean, small rags (polyester works better than cotton), apply the Rub n’ Buff. Wrap the small rag around the index finger and squeeze a very small amount of color onto the rag. Rub it gently on the surface of piece. Cotton swabs can be used to apply Rub n’ Buff to areas that are hard to reach. The more rubbing, the less intense the color. Start from the back relief and work toward the foreground. The colors dry in a minute or two and can be overlaid with other colors. The colors seal themselves and a sealer is not needed.

