
Medium: Adobe Photoshop
Time: 2-3 weeksGrade: 9-12
Objective: Create 4 Holga Inspired Digital Images.
Materials: Digital camera
See more of Refrigeratorgood's power points: SLIDE SHARE <--Click here
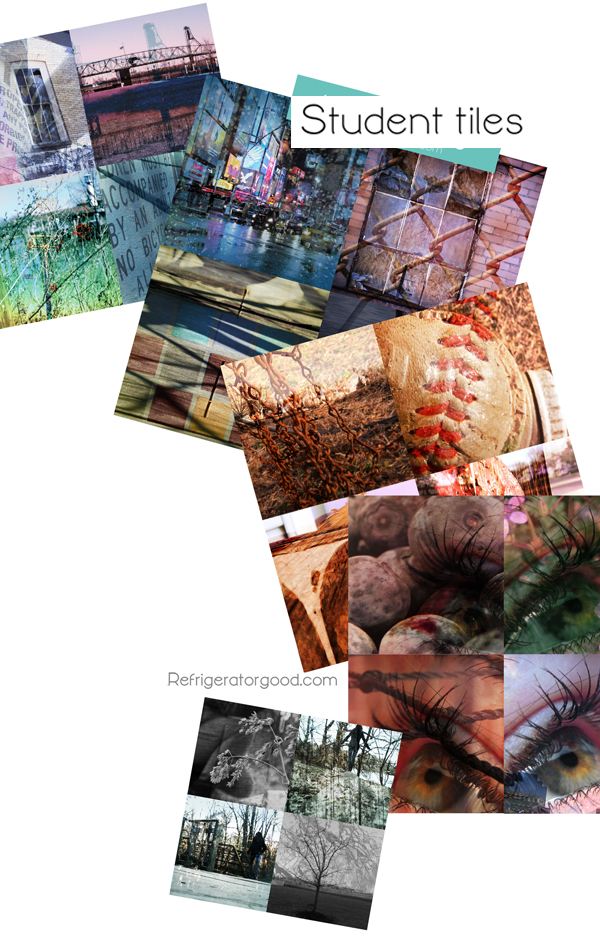
* All photographs taken by the following students grade 9-12: [see above & below] [Monika G.] [Jessica D.] [Taylor H.] [Justin L.] [Alyssa G.] [Tess R.]
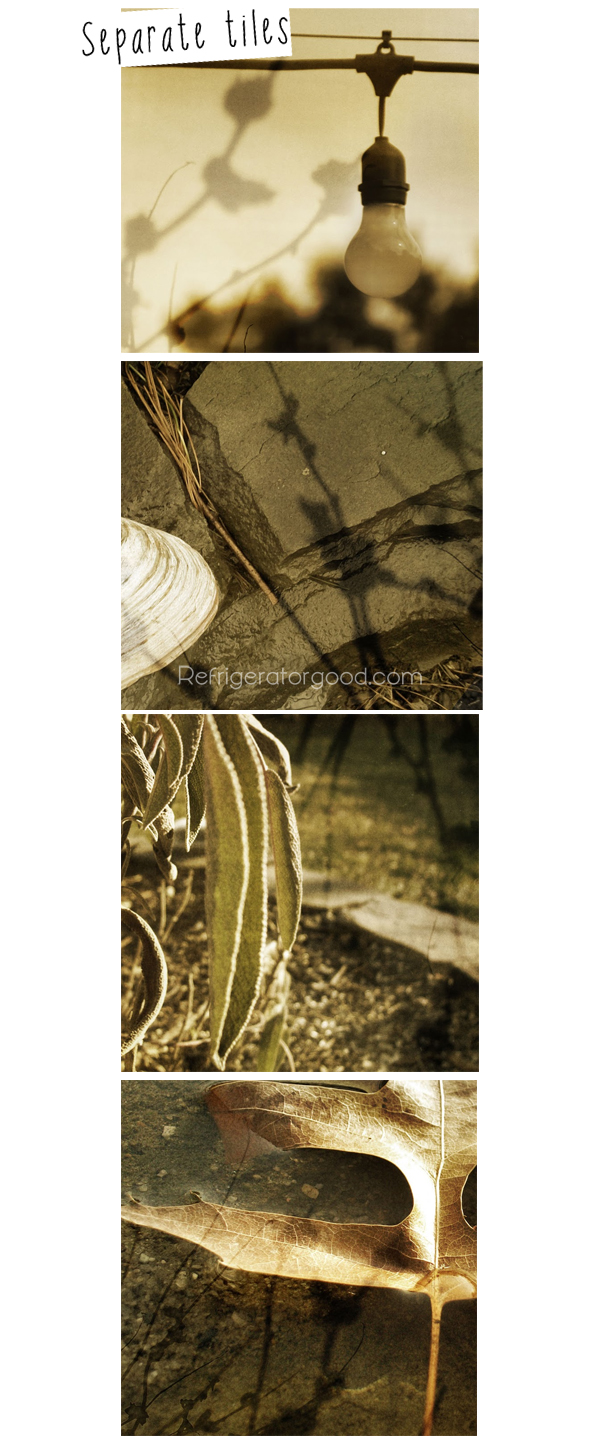
Tip: For this project I encourage students to use images from their Texture, Pattern & Line shooting assignment {Click here for details}
Demo Instructions [See below]
Step 1: Open two Files
Step 2: Introduce Hue and Saturation function {adjustment layer option}
Click on Black and white "cookie" at the bottom of the layers palette.
->Select Colorize option->Move the adjustment sliders to create desired color
Step 3: Drag adjustment layer to the other open image

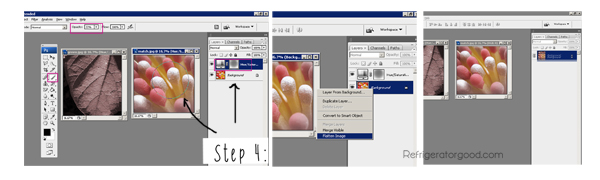
Step 4: Using a soft edges brush, at a lower opacity, paint black
on the adjustment layer image {this will mask some of the color
adjustment and allow the original image to come through.
*Once you achieved the desired masking flatten your image [see bottom right]
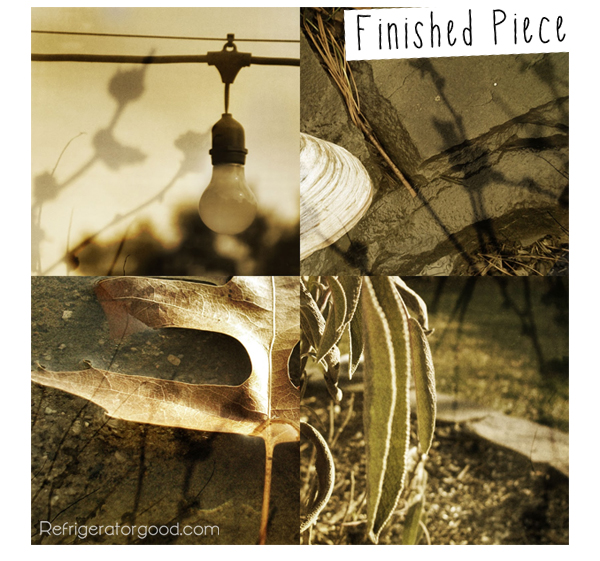
Step 5: Drag flattened image {Layer} to your other file. One image should appear above in your layers palette [see below]
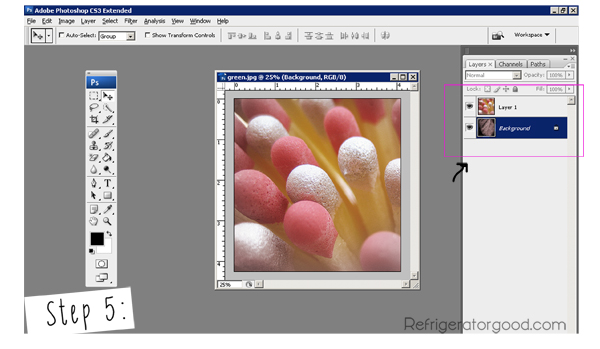
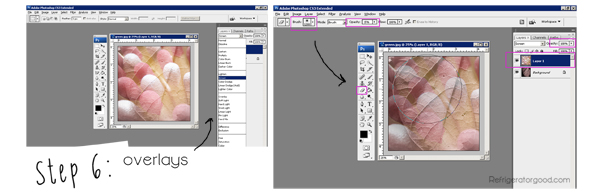
Step 6: Using the later options, located in the layers palette modify the top image.[bottom left]
You may also use the eraser tool to enhance the blending effect [bottom right]
To print tiles on one sheet of paper continue Demo Steps #7-9
Step 7: Create new file 8.5" X 11", 300 resolution
Step 8: Select Ctrl+R to get your rulers, drag and drop rulers to divide page into four, 4.25" quadrants
Step 9: Drag and drop completed Holga image to your quadrants.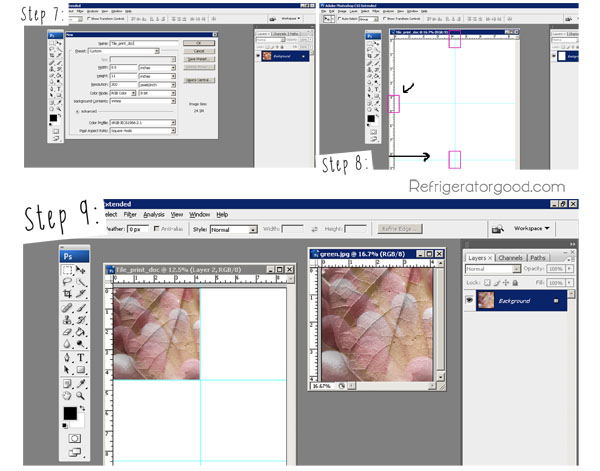
[Below] is another visual for my printing set up. I often display this in the classroom after I finish the demo.
It helps...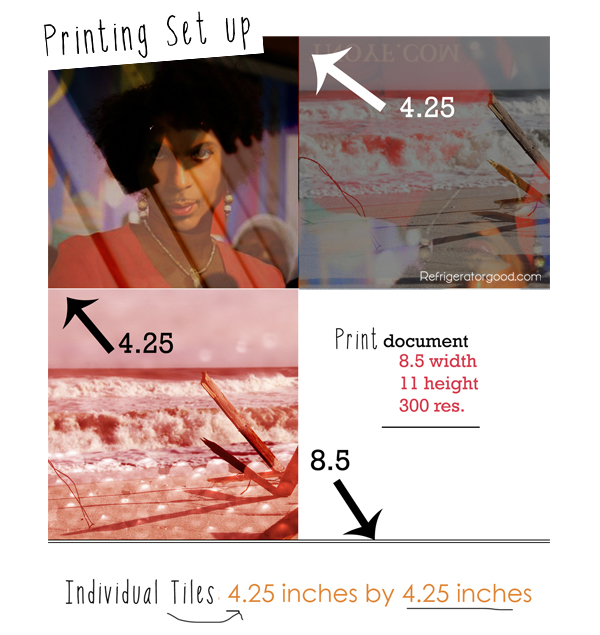
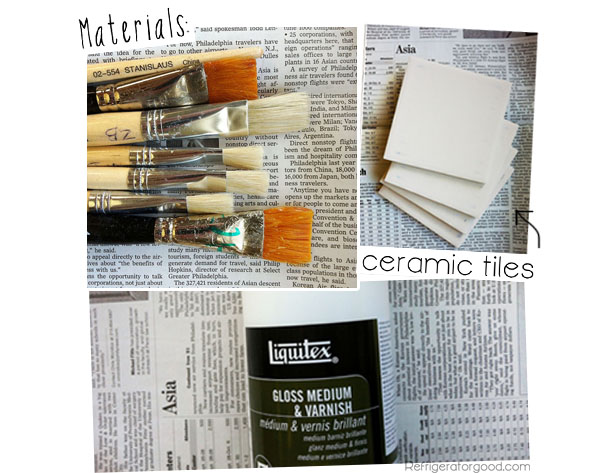
Tip: Use old brushes to mount the images on the tiles. Demo the tile mounting to help students avoid air bubbles. Three coats of Gloss Medium works best for a glossy seal.
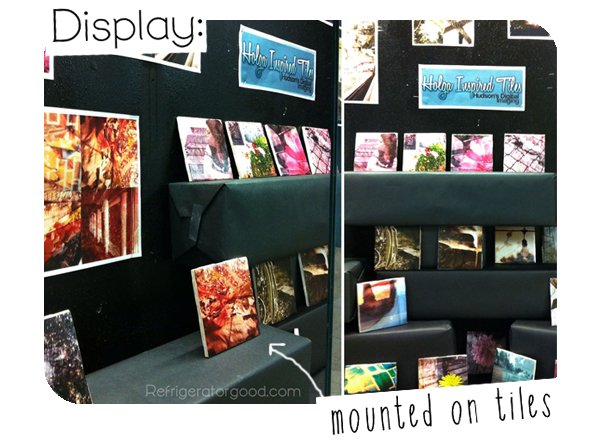
This year's 2012 display!

Class: Digital Imaging
Grade: 9-12
State: NJ
Teachers Artwork: [Website]
